There’s a quiet kind of magic in transforming milk into yogurt. It doesn’t shout or rush—it waits, warms, and whispers its way into being. In a world of instant everything, the Instant Pot offers not just speed, but a vessel for rhythm. A place where fermentation becomes ritual, and breakfast becomes something you made with your own hands.
This guide is for anyone who’s ever opened a store-bought yogurt and wondered what it might feel like to make their own. Not just for the savings or the probiotics, but for the satisfaction of watching something simple become something nourishing. With just milk, a spoonful of starter, and a bit of patience, you’ll learn how to make perfect yogurt—creamy, tangy, and tailored to your taste.
Whether you’re new to fermentation or returning to a forgotten kitchen rhythm, this post will walk you through every step. No fancy gear. No affiliate links. Just warmth, intention, and a pot that knows how to hold space.
🥄 Why Homemade Yogurt Deserves a Place in Your Kitchen
In a kitchen shaped by rhythm—where chopping, stirring, and waiting become acts of care—homemade yogurt fits like a whisper. It’s not loud. It doesn’t demand. It simply arrives, slowly, through warmth and time.
Making yogurt at home isn’t just about saving money or avoiding additives. It’s about reclaiming a process that’s been passed down quietly across generations and cultures. It’s about watching milk transform—not through force, but through patience. It’s about choosing to nourish yourself with something you made, not bought.
There’s a texture to homemade yogurt that store shelves can’t replicate. A softness that comes from your own timing. A tang that reflects your own taste. And a satisfaction that lingers long after the last spoonful.
In the Instant Pot, this ritual becomes accessible. No need for stovetop thermometers or complicated incubators. Just a warm vessel, a few ingredients, and a willingness to wait.
Homemade yogurt deserves a place in your kitchen because it invites you to slow down. To listen. To trust that something good can come from stillness. And once you’ve made it—once you’ve tasted that first batch—you’ll understand: this isn’t just food. It’s a rhythm. A return. A quiet kind of joy.
🔬 Understanding the Yogurt-Making Process
Yogurt-making is less a recipe and more a rhythm. It’s a gentle transformation—milk warmed, seeded, and left to rest. Beneath its simplicity lies a quiet science: fermentation. A process as old as kitchens themselves, where beneficial bacteria turn lactose into lactic acid, thickening the milk and deepening its flavor.
At its core, the process requires three things: heat, culture, and time. The heat prepares the milk, the culture introduces life, and time allows that life to flourish.

Here’s how it unfolds:
- Heating the Milk: This step isn’t just about warmth—it’s about structure. Heating to around 180°F (82°C) denatures the proteins, helping the yogurt set with a smooth, creamy texture.
- Cooling the Milk: Once heated, the milk must cool to around 110°F (43°C)—the sweet spot where live cultures thrive. Too hot, and they perish. Too cold, and they sleep.
- Adding the Starter: A spoonful of plain yogurt or powdered culture introduces the bacteria. These tiny agents of change begin their quiet work, multiplying and fermenting.
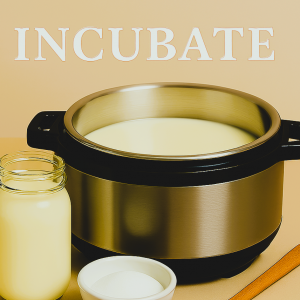
- Incubation: The Instant Pot becomes a sanctuary. For 8 to 10 hours, it holds the milk in warmth and stillness, allowing the transformation to unfold. No stirring. No peeking. Just trust.
- Chilling: After incubation, the yogurt is cooled in the fridge. This halts fermentation and firms the texture. It’s the final step before the first spoonful.
Each phase is simple, but together they form a ritual. One that invites you to slow down, to listen, and to participate in something ancient. The Instant Pot doesn’t replace tradition—it holds it, gently, in stainless steel.
🥛 Essential Ingredients and Tools You Already Have
Yogurt-making doesn’t ask much of you. No rare ingredients. No specialized gear. Just a few quiet essentials—most of which are already waiting in your kitchen.
This isn’t a recipe that demands perfection. It invites presence. And the tools you use become part of the rhythm, not the performance.
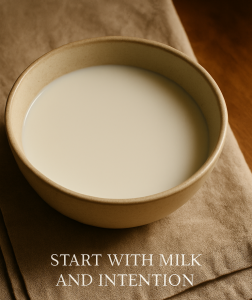
✴️ Milk
Any milk will do—whole, 2%, skim, even non-dairy if you’re feeling experimental. But whole milk offers the creamiest result, rich and full-bodied. Choose what feels right for your taste and your ritual.
✴️ Starter Yogurt
This is your seed. A spoonful of plain, unsweetened yogurt with live cultures is all you need. It carries the bacteria that will transform your milk. Once you’ve made your first batch, you can use your own yogurt as the starter for the next.
✴️ Instant Pot
Not just a pressure cooker—it’s a quiet incubator. The “Yogurt” setting holds the temperature steady, creating the perfect environment for fermentation. No fuss. No flame. Just warmth.
✴️ A Kitchen Thermometer (Optional)
Helpful, but not essential. It gives you confidence during the heating and cooling phases. If you don’t have one, trust your instincts and the rhythm of the process. Many have made yogurt without ever checking a number.
✴️ A Spoon, A Bowl, A Bit of Patience
The rest is simple. Stir gently. Wait quietly. Let the transformation unfold.
Step-by-Step: Making Yogurt in Your Instant Pot
Doesn’t rush. It unfolds. And in the quiet hum of your Instant Pot, milk begins its slow transformation—guided not by force, but by warmth and time. This isn’t just a recipe. It’s a rhythm. A return to stillness.
Here’s how to make perfect yogurt, one step at a time:
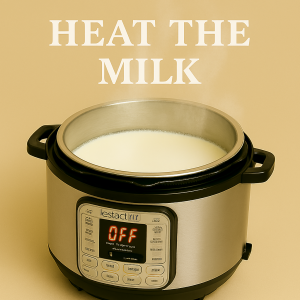
🔥 Step 1: Heat the Milk
Pour your milk into the Instant Pot’s inner pot. Press the “Yogurt” button, then “Adjust” until it reads “Boil.” Let the cycle run until the milk reaches 180°F (82°C). This step denatures the proteins, helping the yogurt set with a smooth, creamy texture.
❄️ Step 2: Cool the Milk
Once the boil cycle finishes, remove the inner pot and let the milk cool to 110°F (43°C). You can speed this up by placing the pot in a cold water bath, or simply let it rest on the counter.

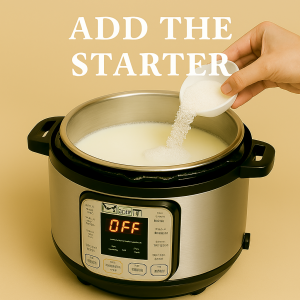
🥄 Step 3: Add the Starter
Take a spoonful of plain yogurt with live cultures and whisk it gently into the cooled milk. Make sure it’s evenly distributed—this is the seed of transformation.
🕯️ Ritual note: Stir with intention. You’re introducing life.
🌡️ Step 4: Incubate
Return the pot to the Instant Pot base. Press “Yogurt” again and set the time: 8 to 10 hours. The longer it incubates, the tangier the yogurt becomes. No stirring. No peeking. Just trust.
🕯️ Ritual note: Let the warmth hold the space. This is where stillness becomes nourishment.
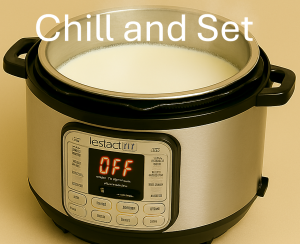
❄️ Step 5: Chill and Set
After incubation, transfer the yogurt to jars or containers and refrigerate for at least 4 hours. This step firms the texture and deepens the flavor.
🕯️ Ritual note: The wait is part of the gift. Let it settle into itself.
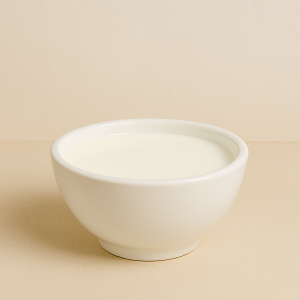
Once chilled, your yogurt is ready. Spoon it into a bowl, dress it with fruit or honey, or enjoy it plain—soft, tangy, and made by your own hands. Each batch carries your timing, your care, your rhythm.
This is yogurt as ritual. And your Instant Pot is more than a machine—it’s a quiet companion in the kitchen, holding space for transformation.
🧭 Texture, Taste, and Timing: What to Expect
Yogurt speaks in subtleties. Its texture whispers of patience, its taste reflects the hours it’s held in warmth. And timing? That’s your signature—your imprint on the final flavor.
Here’s how each element unfolds:
🌿 Texture: From Silken to Spoonable
- Shorter incubation (6–8 hours) yields a softer, milder yogurt—gentle on the tongue, perfect for layering with fruit or granola.
- Longer incubation (10–12 hours) creates a firmer, tangier result—ideal for straining into Greek-style yogurt or using in savory dishes.
🍋 Taste: Tangy, Mild, or Somewhere In Between
- The starter you choose matters. A mild store-bought yogurt will yield a gentle flavor.
- Want more bite? Extend the incubation or use a tangier starter like Bulgarian or Icelandic-style yogurt.
⏳ Timing: Your Signature Flavor
- 8 hours: Balanced, mellow, versatile.
- 10 hours: Tangy, bold, and probiotic-rich.
- 12+ hours: Deeply fermented, with a sharp edge—great for straining or cooking.
Whether you’re crafting yogurt for Daisy’s breakfast table or layering it into a poetic food photo, this step is where your intention shines. Texture, taste, and timing aren’t just variables—they’re emotional lanes. They carry your rhythm, your care, your quiet authorship.
🛠️ Troubleshooting Common Yogurt Issues
Even the most intentional rituals can wobble. Yogurt, like any slow transformation, sometimes resists. But each misstep is a message—a quiet cue to adjust, refine, and deepen your rhythm.
Here’s how to decode the most common yogurt issues and reframe them as part of your creative arc:
🥄 Issue: Yogurt Didn’t Set
Symptoms: Still liquid after incubation. No tang, no texture. Likely Causes:
- Milk wasn’t heated to 180°F (82°C) before cooling
- Starter was inactive or added at the wrong temperature
- Incubation temperature dropped below 110°F (43°C)
🌫️ Issue: Grainy or Lumpy Texture
Symptoms: Yogurt sets, but feels curdled or uneven. Likely Causes:
- Milk cooled too quickly or unevenly
- Starter wasn’t fully whisked in
- Incubation temperature fluctuated
🕯️ Studio Reframe: Graininess is a texture whisper. Next time, stir with intention and let the milk cool slowly. Smoothness is a rhythm, not a rush.
🍋 Issue: Too Tangy or Sour
Symptoms: Sharp flavor, almost bitter. Likely Causes:
- Incubated too long
- Starter was naturally very tangy
- Warm ambient temperature accelerated fermentation
💧 Issue: Excess Whey Separation
Symptoms: Clear liquid pooling on top Likely Causes:
- Over-incubation
- Yogurt was disturbed during incubation
- High-protein milk or starter strain
🕯️ Studio Reframe: Whey is not waste—it’s a byproduct of depth. Stir it back in for creaminess or strain it for Greek-style clarity.
🧊 Issue: Watery After Refrigeration
Symptoms: Yogurt sets well, but thins out in the fridge Likely Causes:
- Didn’t chill long enough before scooping
- Starter strain produces looser texture
- Milk type (e.g., low-fat) affects final consistency
Every yogurt batch is a conversation. These issues aren’t errors—they’re invitations to refine your cadence, adjust your warmth, and deepen your authorship. The Instant Pot is your quiet collaborator. The yogurt is your signature.
🍯 Creative Ways to Flavor and Serve Your Yogurt
Yogurt is a canvas—soft, tangy, and waiting for your brushstrokes. Whether you’re crafting Daisy’s morning ritual or composing a bilingual Pin with emotional resonance, these flavor pairings and serving styles turn yogurt into storytelling.
🌸 Floral & Poetic Infusions
- Rosewater + Pistachio: A whisper of Middle Eastern elegance.
- Lavender Honey: Soft, floral, and calming—perfect for slow mornings.
- Orange Blossom + Cardamom: Bright, spiced, and layered with warmth.
🍓 Seasonal Fruit Rituals
- Summer: Mango purée, grilled peaches, or fresh berries with mint.
- Autumn: Roasted figs, cinnamon apples, or pomegranate jewels.
- Winter: Persimmon slices, citrus zest, or spiced pear compote.
- Spring: Rhubarb jam, strawberry rose, or green tea drizzle.
🍶 Savory & Global Twists
- Greek-style: Cucumber, garlic, dill—tzatziki reborn.
- Indian-style: Cumin, salt, and chopped coriander—cooling and earthy.
- Thai-style: Lime, chili, and fish sauce—tangy and bold.
🍰 Dessert-Inspired Layers
- Lemon curd + crushed graham crackers: Like pie in a jar.
- Cocoa nibs + almond butter swirl: Rich, bitter, and grounding.
- Vanilla bean + maple syrup: Classic, warm, and endlessly comforting.
Yogurt isn’t just served—it’s composed. Each flavor, each drizzle, each spoonful is a chance to deepen the ritual and soften the scroll. Let your audience taste your cadence.
🧊 Storing and Enjoying Your Yogurt Over Time
Yogurt doesn’t end when it sets. It lingers—softly, patiently—in jars and bowls, waiting to be revisited. Like a poem left on the counter, it deepens with time. The way you store it shapes its texture, its flavor, and its emotional lane.
Here’s how to preserve your yogurt’s rhythm and savor it across days:
🫙 Storage Rituals
- Glass jars with tight lids preserve texture and prevent flavor drift.
- Wide-mouth containers make scooping gentle and clean.
- Label with date + batch notes to track incubation time and starter lineage.
❄️ Shelf Life & Flavor Evolution
- Fresh yogurt (day 1–3): Mild, creamy, ideal for fruit pairings.
- Mid-week yogurt (day 4–7): Slightly tangier, great for savory dishes or straining.
- End-of-week yogurt (day 8–10): Deep flavor, best used in cooking or blended into smoothies.
🥄 Enjoying It Slowly
- Spoon it cold with honey and nuts for grounding.
- Stir it into warm oats for comfort.
- Blend it with herbs for a savory dip.
- Freeze small portions for future smoothies or dessert bites.
♻️ Reusing Your Starter
- Save 2–3 tablespoons from your current batch to seed the next.
- Use within 7 days for best potency.
- Rotate starters every few batches to refresh the culture.
Yogurt, once made, becomes a rhythm you return to. It’s not just stored—it’s remembered. Each jar holds a whisper of the moment it was born, the warmth it rested in, the care you stirred into it. Whether you’re composing Daisy’s next Pin or layering a caption for Herman’s savory spread, this is the thread: yogurt as continuity, as quiet trust, as ritual that lingers.
🌙 Final Thoughts: Yogurt as a Daily Ritual
Yogurt is more than food. It’s a rhythm. A quiet act of care that begins with warmth, unfolds in stillness, and ends in nourishment. Whether you stir it at dawn or spoon it under moonlight, each batch carries your timing, your touch, your emotional lane.
It’s a ritual that asks for patience, not perfection. For presence, not performance.
In the hum of your Instant Pot, you’re not just fermenting milk—you’re composing memory. You’re layering trust into texture. You’re building a cadence that can be tasted.
And over time, this ritual becomes a rhythm you return to. A jar in the fridge. A spoon in the bowl. A moment of quiet authorship in a world that rushes.
So whether you’re crafting Daisy’s first Pin or composing a bilingual caption for Herman’s savory spread, let yogurt be your anchor. Your soft signature. Your daily ritual.